2008年3月9日 星期日

JavaScript 日期加減 及 日期相差

1.日期加減
<script language=javascript>
function addDate(dy,dmomth,dd,dh,dm,dadd){
var a = new Date(dy,dmomth,dd,dh,dm)
a = a.valueOf()
a = a + dadd * 1 * 60 * 60 * 1000
a = new Date(a)
return a;
}

var now = new Date();
var years = now.getYear();
var months = now.getMonth()+1;
var days = now.getDate();
var hours = now.getHours();
var minutes = now.getMinutes();

NextNow = addDate(years,months-1,days,hours,0,-1);
years = NextNow.getYear();
months = NextNow.getMonth()+1;
days = NextNow.getDate();
hours = NextNow.getHours();

</script>

2.日期相差

<script language=javascript>

Date.prototype.dateDiff = function(interval,objDate){
var dtEnd = new Date(objDate);
if(isNaN(dtEnd)) return undefined;
switch (interval) {
case "s":return parseInt((dtEnd - this) / 1000);
case "n":return parseInt((dtEnd - this) / 60000);
case "h":return parseInt((dtEnd - this) / 3600000);
case "d":return parseInt((dtEnd - this) / 86400000);
case "w":return parseInt((dtEnd - this) / (86400000 * 7));
case "m":return (dtEnd.getMonth()+1)+((dtEnd.getFullYear()-this.getFullYear())*12) - (this.getMonth()+1);
case "y":return dtEnd.getFullYear() - this.getFullYear();
}
}

var sDT = new Date("2004/05/20 07:30:00");
var eDT = new Date("2005/05/20 08:32:02");
document.writeln("秒差 : "+sDT.dateDiff("s",eDT)+"<br>");
document.writeln("分差 : "+sDT.dateDiff("n",eDT)+"<br>");
document.writeln("時差 : "+sDT.dateDiff("h",eDT)+"<br>");
document.writeln("日差 : "+sDT.dateDiff("d",eDT)+"<br>");
document.writeln("週差 : "+sDT.dateDiff("w",eDT)+"<br>");
document.writeln("月差 : "+sDT.dateDiff("m",eDT)+"<br>");
document.writeln("年差 : "+sDT.dateDiff("y",eDT)+"<br>");
</script>

2008年1月13日 星期日

linux 使用 wake on lan

可以試建立
/etc/init.d/halt.local

~~~內容如下
# script with local commands to be executed from init on system shutdown
#
# Here you should add things, that should happen directly before shuting
# down.
#
# enable WOL for magic packet (g) and broadcast (b)
#wol pumbagsd...
# Set Wake-on-LAN options. Not all devices support this. The
# argument to this option is a string of characters specifying
# which options to enable.
# p Wake on phy activity
# u Wake on unicast messages
# m Wake on multicast messages
# b Wake on broadcast messages
# a Wake on ARP
# g Wake on MagicPacket(tm)
# s Enable SecureOn(tm) password for MagicPacket(tm)
# d Disable (wake on nothing). This option clears all previous
# options.
/sbin/ifup eth0
/usr/sbin/ethtool -s eth0 wol g
#/usr/sbin/ethtool eth0

沒有ethtool 要先安裝 ethtool 套件:
apt-get install ethtool

執行 ethtool:
$ ethtool eth0
Settings for eth0:
Supports Wake-on: g
Wake-on: d
Link detected: yes

主要要看 Wake-on 這一項,要設成 g:

$ ethtool -s eth0 wol g

在執行一次 ethtool 確認有設定好:

$ ethtool eth0
Settings for eth0:
Supports Wake-on: g
Wake-on: g
Link detected: yes

由於這是在電腦開機前動作,
被喚醒的電腦只需要有 BIOS 及硬體有支援即可!
這樣就 ok 了。

2007年11月1日 星期四

開啟 La Fonera Plus SSH


1.所需軟體

(1)FTPD32.exe
(2)PuTTY
(3)Image File (解壓後放到tftpd中)

2.操作流程

(1)
網路線接到LAN,並設定電腦IP (IP address to 192.168.1.254, netmask 255.255.255.0)

(2)
用 PuTTY Telnet 連 La Fonera Plus (192.168.1.1 port 9000)
連入後按 CTRL+C 中止 script
*************************************************
== Executing boot script in 0.890 seconds - enter ^C to abort
^C
RedBoot>
*************************************************

(3)
可看一下FLASH位置(輸入 fis list )
*************************************************
RedBoot> fis list
Name FLASH addr Mem addr Length Entry point
RedBoot 0xA8000000 0x80040400 0x00030000 0xA8000000
loader 0xA8030000 0x80100000 0x00010000 0x80100000
image 0xA8040000 0x80040400 0x00230004 0x80040400
image2 0xA8660000 0xA8660000 0x00140000 0x80040400
FIS directory 0xA87E0000 0xA87E0000 0x0000F000 0x00000000
RedBoot config 0xA87EF000 0xA87EF000 0x00001000 0x00000000

*************************************************

(4)
做一些確認
*************************************************
RedBoot> x -b 0xa8040000 -l 32
A8040000: 00 21 BF DE A2 14 D3 9B 00 0A 50 34 6D 00 00 80 |.!........P4m...|
A8040010: 00 FF FF FF FF FF FF FF FF 00 04 02 48 80 0E 0F |............H...|
*************************************************
另一個確認
*************************************************
RedBoot> x -b 0xa8250000 -l 32
A8250000: 1E 5E B5 70 5D FA DE 16 AE 98 85 61 87 D5 E2 09 |.^.p]......a....|
A8250010: D2 C1 70 A0 DD F6 2A 30 7F C8 5E 0B 00 DF 50 0A |..p...*0..^...P.|
*************************************************

(5)
開啟TFTPD32 server準備寫入La Fonera Plus
讀取image.bin
*************************************************
RedBoot> load -r -b 0x80100000 image.bin
Using default protocol (TFTP)
Raw file loaded 0x80100000-0x8070ffff, assumed entry at 0x80100000
RedBoot> cksum -b 0x80100000 -l 0x00610000
POSIX cksum = 1614928997 6356992 (0x6041dc65 0x00610000)
RedBoot>
*************************************************
寫入到FLASH memory
*************************************************
RedBoot> fis write -b 0x80320000 -f 0xa8260000 -l 0x003f0000
* CAUTION * about to program FLASH
at 0xa8260000..0xa864ffff from 0x80320000 - continue (y/n)? y
... Erase from 0xa8260000-0xa8650000: ...............................................................
... Program from 0x80320000-0x80710000 at 0xa8260000: ...............................................
..............
RedBoot>
*************************************************
重開
*************************************************
RedBoot> reset
*************************************************

(6)
重開好機
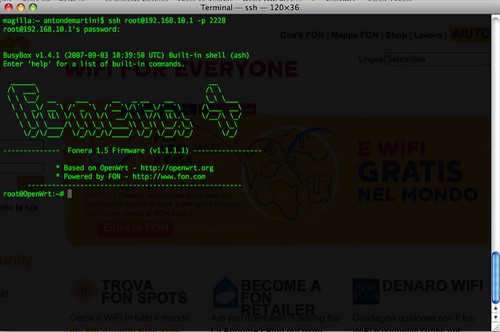
網路線接到WAN ,用 PuTTY SSH 連 La Fonera Plus (192.168.10.1 port 22)
連入後輸入root的帳密

沒意外則會出現如下圖


參考位置
1.http://fonblog.eu/2007/10/28/fonera-plus-hack-finally-we-did-it/
2.http://www.fonboard.nl/wiki/Unlock_la_fonera_plus#Windows_howto